
Transforming the heart of your home into the kitchen of your dreams begins with dismantling the outdated fixtures you currently have. Whether hiring a professional for the renovation or taking on the project, managing the demolition can significantly cut costs. Below, we provide a step-by-step guide on how to demolish a kitchen and prepare for an exquisite makeover proficiently.
Preparing Your Workspace
- Securing and Organizing Your Belongings – Ensure all kitchen items, including dishes and appliances you intend to keep, are safely boxed and stored away from the demolition area. This is an opportune moment to declutter and organize your kitchen essentials.
- Utility Shutdown Procedures – To ensure safety, you must shut off all utilities before starting the demolition. This includes electricity, water, and gas. Refer to your utility maps or conduct a trial-and-error process to locate the correct switches and valves.
- Appliance and Fixture Removal – Consider the disposal or donation of old appliances. Any appliances you wish to retain should be relocated to a safe area to avoid damage during the demolition.
- Renting a Junk Removal Dumpster – All-In Dumpster Rentals can provide a convenient 20-yard junk removal dumpster for your kitchen debris. This will facilitate an efficient cleanup process and prevent disruptions to your work area.
Step-By-Step Kitchen Demolition Process
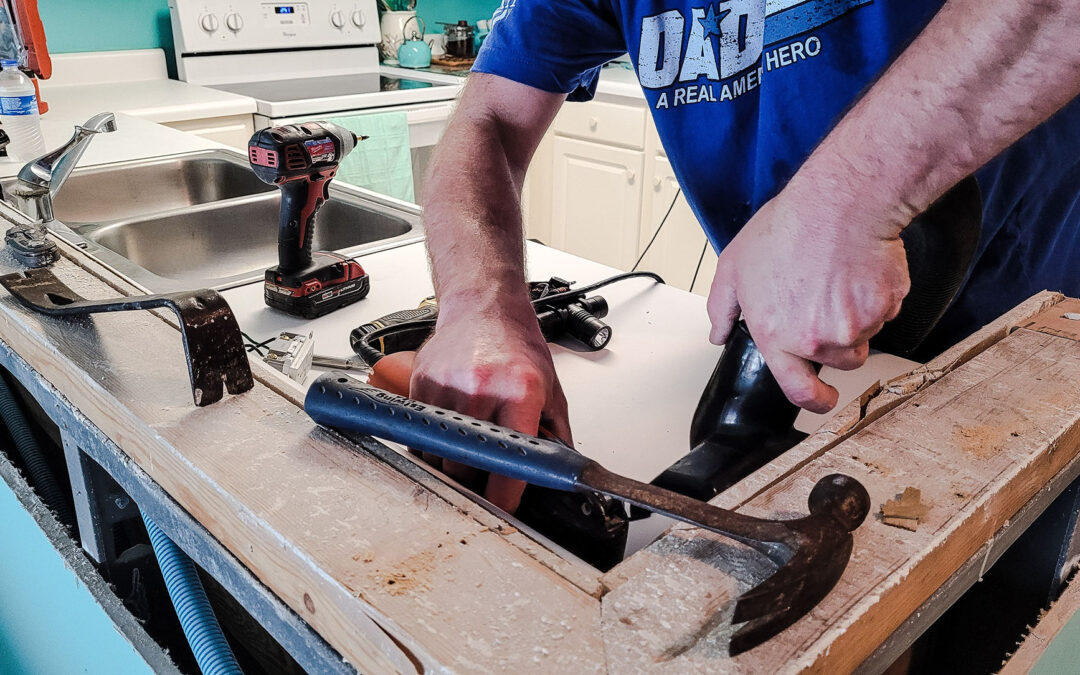
Step 1: Countertop Removal
Removing the countertops using the appropriate tools, such as a pry bar, screwdriver, and putty knife. For heavy countertops, professional help is recommended.
Step 2: Base Cabinet Disassembly
After the countertops are out, proceed with the base cabinets. Carefully remove any attached trim, unscrew the cabinets from the wall and each other, and clear the area of any debris.
Step 3: Wall Cabinet Removal
This step requires extra hands for safety. Unscrew and remove the wall cabinets with the assistance of helpers to support the weight as they are detached.
Step 4: Backsplash Dismantling
Protect the work area with drop cloths or old sheets before chiseling away the tiles. Remove any switch plates and pry the tiles off the wall carefully.
Step 5: Flooring Extraction
For vinyl or linoleum flooring, specific tools like a utility knife, putty knife, and possibly a wallpaper steamer or heat gun will be necessary. Remember to test older flooring for asbestos before proceeding.
Final Thoughts and Next Steps
With the kitchen stripped down, you’re ready to build your modern culinary space. The savings from demolishing yourself can be allocated to luxurious upgrades or essential kitchen appliances.
Living Accords During Renovation
If you’re wondering how to maintain a functional household during this transition, consider exploring our tips for managing a household during significant home renovations.
Remember, All-In Dumpster Rentals supports your kitchen remodeling project with reliable junk removal dumpster services. Ensure to check for availability in your area to keep your demolition process streamlined and hassle-free.
Read Next: All-In Solutions for Your Office Move: Dumpster Rentals
Click here or call us to book an appointment!